
Building mobile apps is super exciting, but it can also can be a challenge. Have you ever experienced the frustration of building a mobile app on your machine, only to face roadblocks when collaborating with team members? In this blog, I’ll introduce a solution which automating your mobile app builds with CodeMagic.
With CodeMagic, you can streamline your development workflow and ensure consistent and reliable builds, regardless of your team’s diverse environments. By automating the build process, you can avoid compatibility issues and focus on developing features that matter.
Additionally, I’ll show you how to integrate your workflow into Slack or Discord so that you can receive notifications every time a build is completed.
CodeMagic offers a lot of features to make your CI/CD process easier, especially for mobile development. Initially, it only supported Flutter, but now you can add Android, iOS, and React Native, with many advanced configurations and APIs. It also provides a free tier, so you should give it a try.
while CodeMagic provides a lot of options, the free tier offers 500 minutes every month for using their M1 machine. So, use it wisely.
Setting up a CodeMagic account & Github repository
The first step is to sign up for a CodeMagic account using your preferred repository host. In this blog, I’ll be using Github since it’s commonly used. After signing up, head to the CodeMagic dashboard. Click on “Add Application” to create a new app. Choose the individual plan, then paste the link of your Github repository where you want to connect it with CodeMagic. Finally, click “Finish: Add Application” to complete the process.
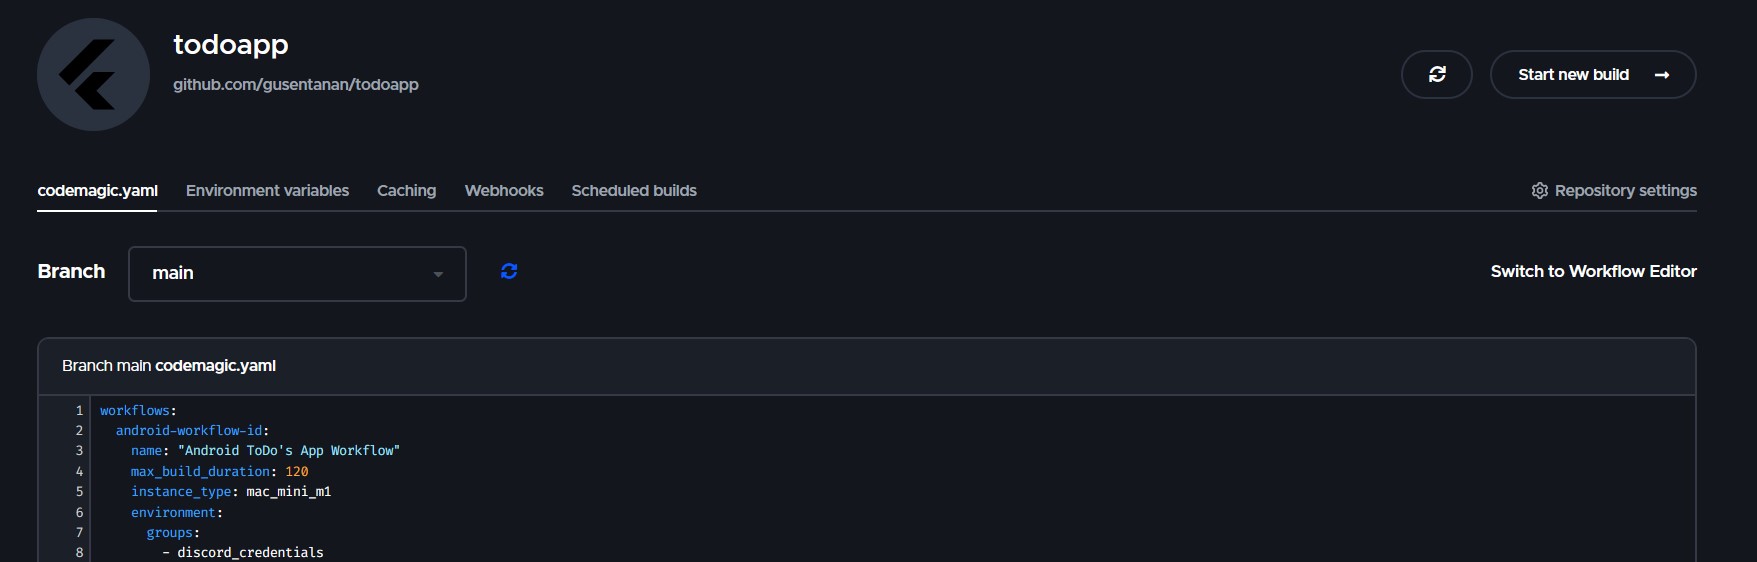
There are two options to enable the workflow, using a .yaml file and using the workflow editor on the CodeMagic dashboard. I personally prefer using the yaml approach because it helps me learn scripting as well.
This is basically what your dashboard looks like after completing the repository addition.
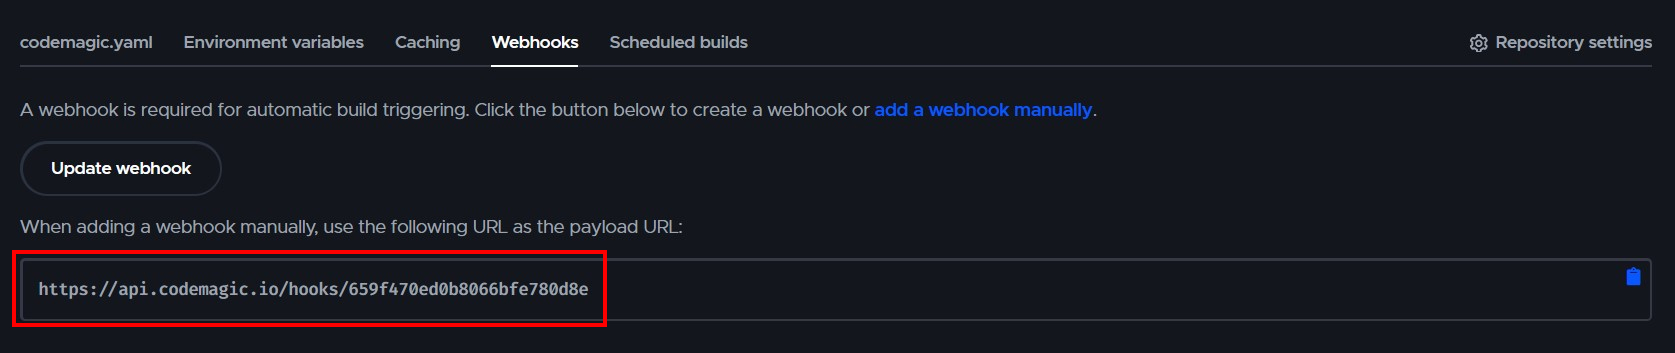
Before we dive into creating your codemagic.yaml to initiate the workflow, we need to manually add the webhook URL of our CodeMagic app to our GitHub repository. Go to your application dashboard, and copy the webhook URL for your CodeMagic application.
And then go to your GitHub repository > Settings > Webhooks and paste the CodeMagic webhook URL into your repository.
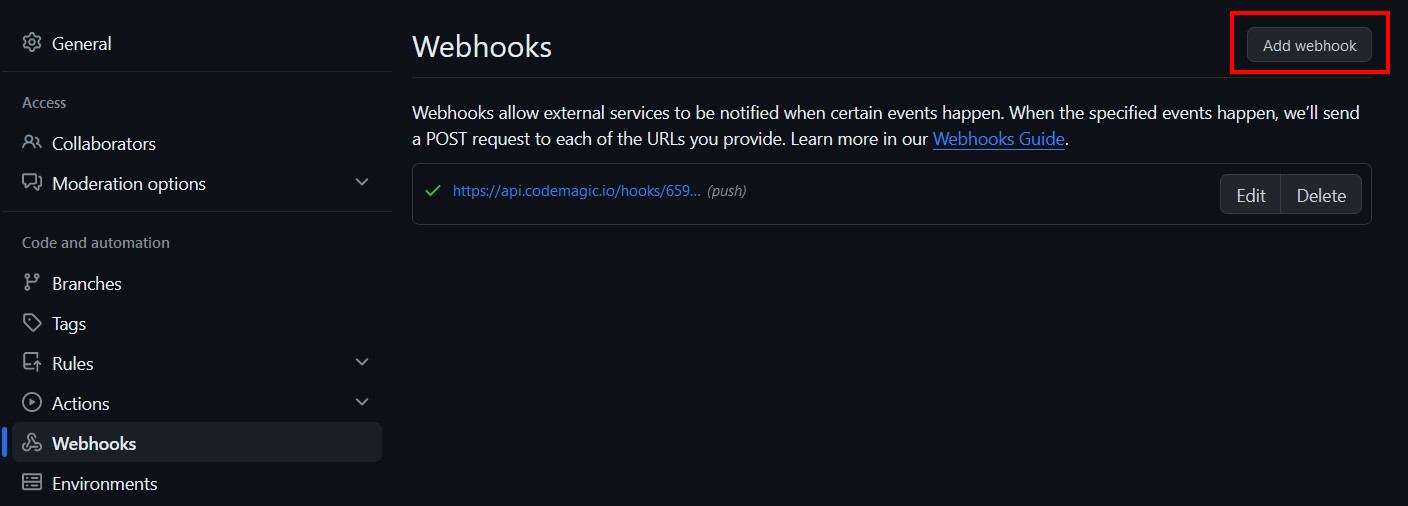
And voila! your CodeMagic and Github are connected now.
Creating your codemagic.yaml
Alright, let’s start the coding session. To really get how things work, we’ll begin with the simplest setup. Also, it’s good to understand the basics before moving on to more advanced configurations.
First you need to define your workflow ID (with ’-’ to separate each word) and also the name and maximum build duration of your app.
workflows:
  android-workflow-id:                    # your workflow ID
    name: "Android ToDo's App Workflow"
    max_build_duration: 120               # max duration of your build
    instance_type: mac_mini_m1            # remote machine to run your workflow
Next, we have the environment property, which is commonly used to specify your project’s settings for building.
For example, you can specify the versions of Flutter or Java used in your project.
workflows:
  android-workflow-id:
    ...
        environment:  # env scope for your build
            flutter: 3.0.5
            java: 17
This one is really important - triggering is the property that makes your build run based on actions or events in your GitHub repository.
There are 4 build triggers, but I’ll write just 3 most important (at least for me) :
- push : starts every time you commit code to any of the tracked branches.
- pull_request : starts when a pull request is opened or updated to verify the resulting merge commit.
- tag : automatically builds the tagged commit whenever you create a tag for this app.
workflows:
  ...
    triggering:
          events:
            - push  # trigger on push events
          branch_patterns:
            - pattern: "*" # * indicates any branch pattern (main, dev etc)
              include: true
              source: true
When setting up triggers for pull requests, you can choose whether each branch pattern matches the source or target branch of the pull request.
you can read more about the triggering property on their docs
Next up is the scripts property, where you put the scripts needed to run your build. Make sure the order of your scripts is correct because they are executed from top to bottom.
Also, it’s helpful to have a basic understanding of how to use Linux commands. This knowledge will allow you to make the most of its features, especially for debugging purposes.
workflows:
  ...
    scripts:
    - name: Set up local.properties
      script: |
        echo "flutter.sdk=$HOME/programs/flutter" > "$CM_BUILD_DIR/android/local.properties"
    - name: Get Flutter packages
      script: |
        flutter packages pub get
    - name: Build Debug App with Flutter
      script: |
        flutter build apk --debug
    - name: Show Build apk Folder  # tips. add this command to see the content of your artifact
      script: |
        ls build/app/outputs/flutter-apk
Lastly, we can specify the artifact, which stores our build results, and the publishing property, which contains options for where you want to publish your artifact.
workflows:
  ...
    scripts:
      ...
      ...
    artifacts:
      - build/app/outputs/flutter-apk/*.apk  # specify path to store your artifact
    publishing:
      email:
        recipients:
          - example@gmail.com  # email recipient in case you want to see the reports
This is the full code of your codemagic.yaml to start the workflow.
workflows:
  android-workflow-id:
    name: "Android ToDo's App Workflow"
    max_build_duration: 120
    instance_type: mac_mini_m1
    environment:
      flutter: stable
    cache: # tips. add cache mechanism to fasten your build process
      cache_paths:
        - ~/.pub-cache
    triggering:
      events:
        - push
      branch_patterns:
        - pattern: "*"
          include: true
          source: true
    scripts:
      - name: Set up local.properties
        script: |
          echo "flutter.sdk=$HOME/programs/flutter" > "$CM_BUILD_DIR/android/local.properties"
      - name: Get Flutter packages
        script: |
          flutter packages pub get
      - name: Build Debug App with Flutter
        script: |
          flutter build apk --debug
      - name: Show Build apk Folder
        script: |
          ls build/app/outputs/flutter-apk
    artifacts:
      - build/app/outputs/flutter-apk/*.apk
    publishing:
      email:
        recipients:
          - example@gmail.com
Start the builds
To kick off your CodeMagic workflow, you have two options. You can either use the CodeMagic dashboard to manually start your build, or you can set up triggering events based on your codemagic.yaml file. For instance, you might want to start the build every time you push new changes to your repository.
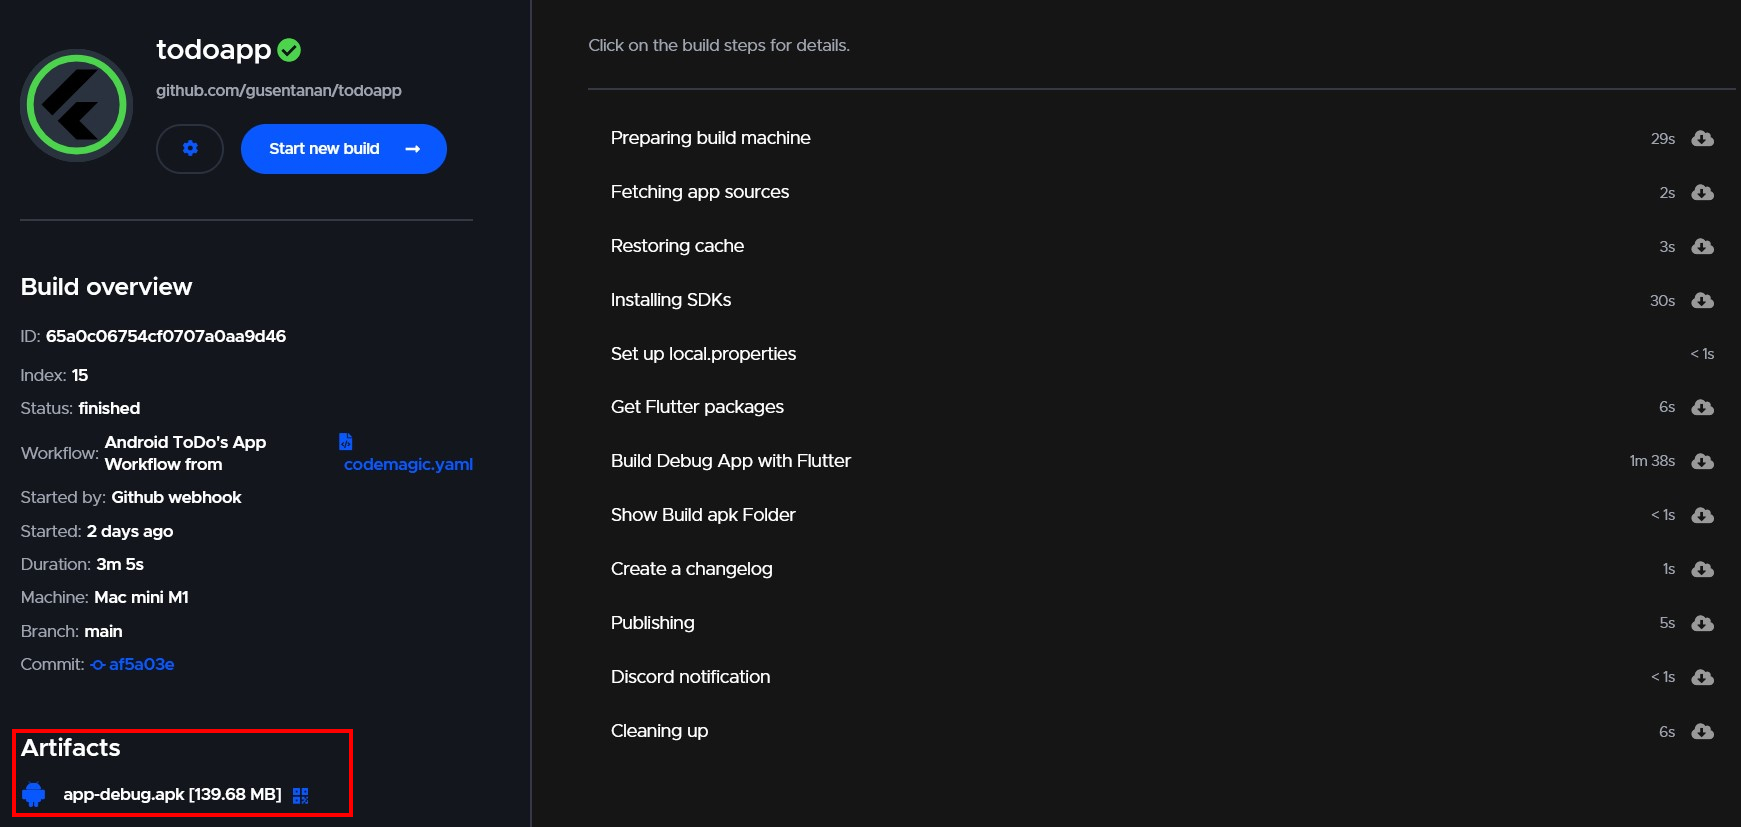
If everything goes smoothly, you’ll be able to see the artifact in the build overview of your app.
You can also debug your build process using SSH or VNC access. This can be very helpful if you need to troubleshoot any issues on your remote machine.
Integration with Discord
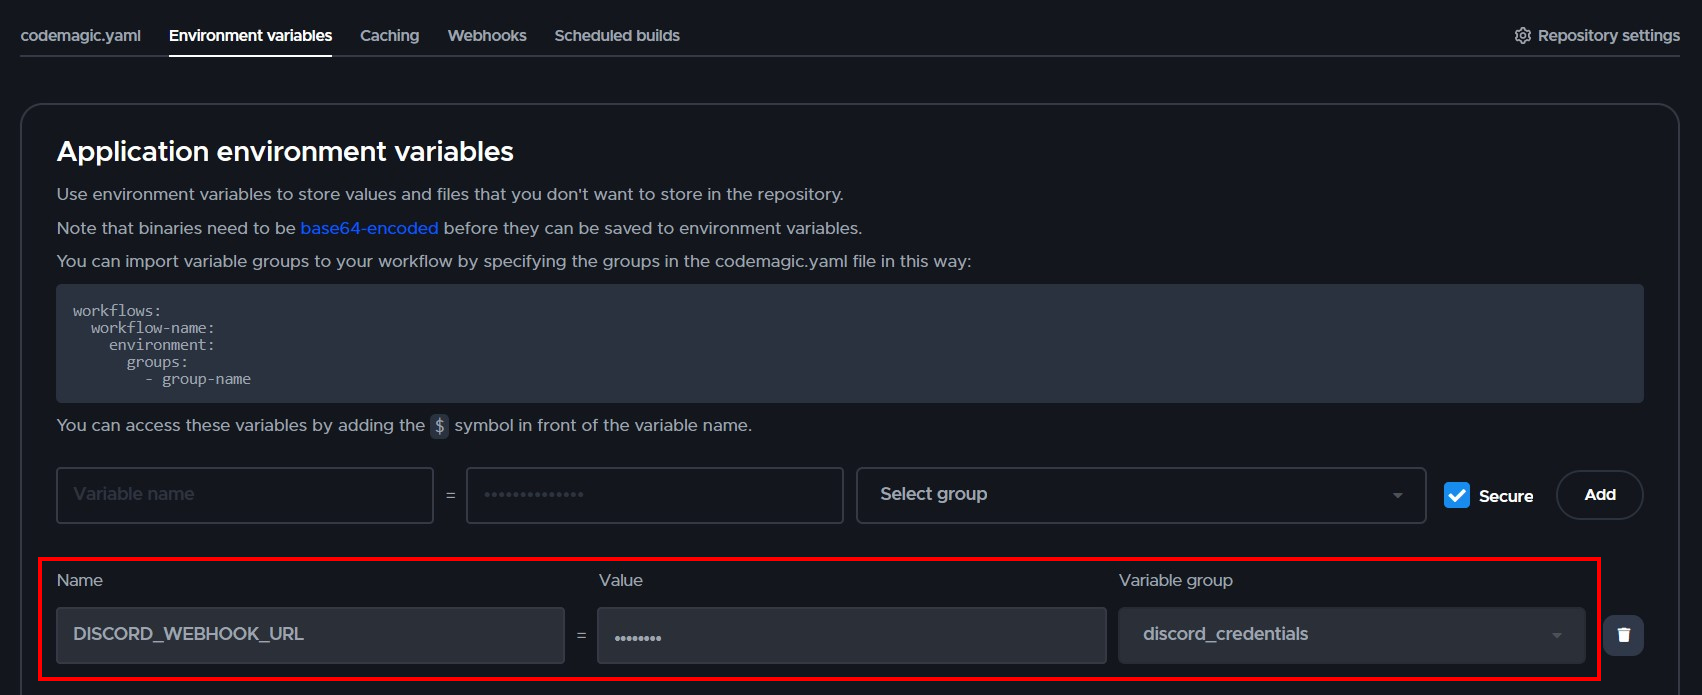
Lets start diving into the fun part. First, you need to obtain your Discord webhooks from your channel where you want to receive notifications. Then, add the webhook URL to the environment section in your CodeMagic app.
You can access your variables in your workflow code using the $ symbol in front of them (like $DISCORD_WEBHOOK_URL). Also, you need to specify the variable group that you created inside the environment property.
To connect with Discord, you can include this command within the publishing section.
workflows:
...
environment:
groups:
- discord_credentials # variable group that stores discord webhook
...
publishing:
...
scripts:
- name: Discord notification # use the webhook URL at the end of the scripts
script: |
set -ex
# Extract the App Link from CM_ARTIFACT_LINKS
APP_LINK=$(echo "$CM_ARTIFACT_LINKS" | jq -r '.[] | select(.name == "app-debug.apk") | .url')
# Get the first 7 digits of the commit number
COMMIT=$(echo "${CM_COMMIT}" | sed 's/^\(........\).*/\1/;q')
# Get the commit message
COMMIT_MESSAGE=$(git log --format=%B -n 1 $CM_COMMIT)
# Get the commit author
AUTHOR=$(git show -s --format='%ae' $CM_COMMIT)
# Publish the notification
curl -H "Content-Type: multipart/form-data" \
-F "payload_json={
\"username\": \"codemagic-bot\",
\"content\":
\"**Commit:** \`$COMMIT\`\\n**Commit message:** $COMMIT_MESSAGE\\n\\n**Branch:** $CM_BRANCH\\n
**Author:** $AUTHOR\\n\\n**Artifacts:**\\n\\n**App Links:** $APP_LINK\\n\\n\"}" \
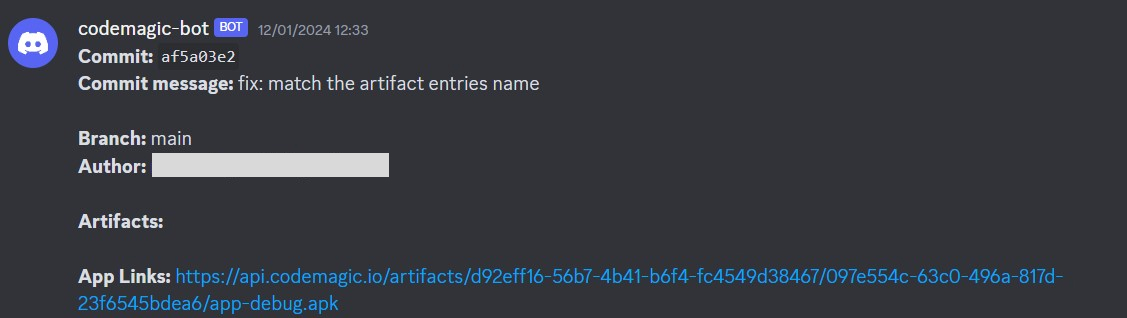
$DISCORD_WEBHOOK_URL Make changes and try pushing them to your remote repository. If the build is successful, you’ll receive a notification.
Conclusion
This tool comes with many benefits for your development – it speeds up development and resolves your build problems. It can also automate your testing, deployment, or publishing your app to PlayStore or AppStore, among many other features.
Well, that’s all for this blog. Pretty cool, right? Give it a try, and your future self and teammates will thank you.
References. Codemagic Official Docs